
04 Jun 6 Tips to a Well-Ventilated Tiny House
Unlike in a traditional-sized house, one 1200-2600 square feet, basic household uses that naturally produce moisture can disperse easily. However, when doing these same living functions such as showering, running a dishwasher, doing laundry, etc, builds moisture with little to no way to escape in the only 90-300 square feet of a tiny home.
Lacking Proper Ventilation Can Cause:
- Black Mold/Mildew
- Health and Allergy Concerns
- Moisture Build-up Inside Windows/Walls/Home
- Damage to Electronics
Condensation in a tiny house builds up first in windows, ceilings, and walls. Without proper intervention and treatment, this moisture will become mildew, mold, and possibly toxic build up inside walls and insulation.
Air allergens are more dangerous amidst humid environments, creating a higher probability for asthma-related flare-ups.
To prevent condensation and ventilation issues in your tiny house, follow these tips:
While Building, Use Weather and Vapor Barriers
Weather barriers are typically plastic and lay overtop of the exterior sheathing and underneath the exterior 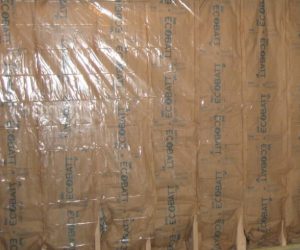 siding. These barriers help prevent water from getting into the house while allowing water inside to escape from the house. Weather barriers also add some insulating properties as it slows air flow..
Vapor barriers are sheets of plastic applied in a build between insulation and the interior walls.
A vapor barrier can decrease moisture in certain climates and increase it in others. Vapor barriers should be used in cold climates when heat is often being used inside, but in hot and humid climates, it should not be used as it can cause moisture to accumulate.
The only place a vapor barrier is not a good idea is in climates that remain hot and humid year-round.
Include and Open Several Windows
Because condensation is reduced by opening windows, the more windows you can incorporate into your build the better.
Kitchen windows, bathroom windows, and even bedroom windows can all help to vent the condensation that typically builds up in these areas.
Double-paned windows are less-likely to produce and hold condensation so this type is worth the extra upfront cost.
Choose Wisely When Opting for A/C
Know the size of your tiny home and how each wall will break up the space as having an air conditioning unit that is too small such as a window unit or too large like a mini split can actually produce too much moisture.
For the square footage in most tiny homes, an RV ceiling mounted unit can be both an affordable and a safe option for reducing moisture build up in your THOW.
Choose Dry Heat
Propane heaters tend to dominate small living quarters as a means of heat. However, this type of heating element will add moisture to the air inside your tiny.
Electric heaters and small wood stoves both produce dryer heat for reduced moisture production inside.

Incorporate Fans and Air Vents
Ventilation is a key to reducing moisture. As with ceiling fans in traditional homes and inside the bathrooms of RVs, these can be a crucial component in tiny homes.
Be sure to incorporate 12v DC powered vents so you can run them while showering, cooking, or laundering clothing without the need to plug in.
Be sure to keep your vents clean and replace any filters needed as directed. Reusable, washable filters are available for a more eco friendly option.
Dehumidify
A standard dehumidifier will reduce the moisture out of the air. These work well but they require space and power that is on short supply in many tiny houses.
Choose a small bedroom unit and run it in specific rooms when needed, such as in the bathroom during showers and in the kitchen during cooking.
Sorry, the comment form is closed at this time.